Finished bumber respray :)

General Questions and comments

Moderators: IMC, Club Staff

User avatar
bas
Grease Monkey
Posts: 162
jedwabna poszewka promocja
Joined: Sun May 31, 2009 5:00 pm

Finished bumber respray :)

Post by bas »

Tell me what you think, was my first time spraying.

Bit of a learning curve but turned out pretty good :D

Image

Image

Image
EscapingFate
Mechanic
Posts: 664
Joined: Sun Oct 10, 2010 9:33 pm
Location: Sydney

Re: Finished bumber respray :)

Post by EscapingFate »

Nice looks good man... Maybe you can show me how to respray... :P i need to do redo my rear bumper.. haha
Image
User avatar
bas
Grease Monkey
Posts: 162
Joined: Sun May 31, 2009 5:00 pm

Re: Finished bumber respray :)

Post by bas »

Haha thanks man, but im no expert.

Its a lot of work in the prep stage, sanding and filling and priming

then it takes abit of skill in the spraying stage.

Shoot me a question if you have one though ill try help
User avatar
aza013
NSW Coordinator
Posts: 9089
Joined: Mon Mar 26, 2007 5:00 pm
Location: The Shire
Contact:

Re: Finished bumber respray :)

Post by aza013 »

Looks good :thumright: .
Job well done.
User avatar
Kustom
Oldtimer
Posts: 6144
Joined: Sun Oct 04, 2009 5:00 pm
Location: Brisbane

Re: Finished bumber respray :)

Post by Kustom »

Looks good buddy.
Image
Taz wrote:When funds allow
User avatar
Astron_Boy
Trolling Gen Y
Posts: 8400
Joined: Sun May 27, 2007 5:00 pm
Location: Wine Country NSW
Contact:

Re: Finished bumber respray :)

Post by Astron_Boy »

looks quite good.

Did you spray them laying down like that?
Image
User avatar
bas
Grease Monkey
Posts: 162
Joined: Sun May 31, 2009 5:00 pm

Re: Finished bumber respray :)

Post by bas »

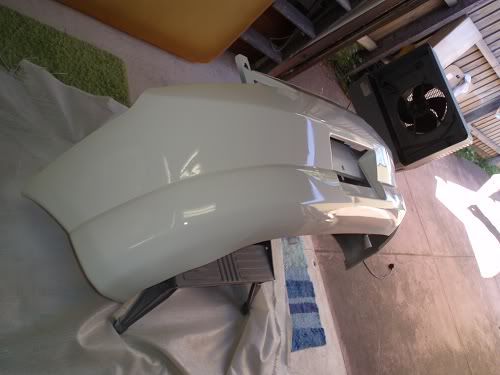
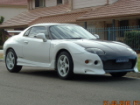
Thanks guys, its not perfect. i got one or two runs on the front bumper but they're pretty low down might sand em out when i get a chance. The pics make em look better than they are but im still pretty pleased.
User avatar
bas
Grease Monkey
Posts: 162
Joined: Sun May 31, 2009 5:00 pm

Re: Finished bumber respray :)

Post by bas »

Astron_Boy wrote:looks quite good.

Did you spray them laying down like that?
as you see them was as i painted them
User avatar
Astron_Boy
Trolling Gen Y
Posts: 8400
Joined: Sun May 27, 2007 5:00 pm
Location: Wine Country NSW
Contact:

Re: Finished bumber respray :)

Post by Astron_Boy »

Fair enough.

Tip for next time, spray the items as they would be on the car.
So for the bumpers, you want to spray it supported, so the noses are facing you, and not the roof.

For a first go however it is quite good though.
Image
User avatar
koolio1234
Oldtimer
Posts: 2574
Joined: Sat Oct 04, 2008 5:00 pm
Location: Western Sydney
Contact:

Re: Finished bumber respray :)

Post by koolio1234 »

Looks good, better than what I could do :D
[img]http://i710.photobucket.com/albums/ww104/thekrevolution/FTOFINALSIGNATUREcopy.png[/img]
User avatar
bas
Grease Monkey
Posts: 162
Joined: Sun May 31, 2009 5:00 pm

Re: Finished bumber respray :)

Post by bas »

Wats the advantages of spraying them in the orientation they would be on the car?

i did them like that because i wanted the paint to lay flat and the majority of the area on the bumpers is across the front face so thought id better have that flat
User avatar
Tippin
Oldtimer
Posts: 1663
Joined: Wed Feb 27, 2008 6:00 pm
Location: Sydney

Re: Finished bumber respray :)

Post by Tippin »

Its to do with the way the paint pigments settle down on the surface.

You may notice a colour difference when you compare your bumpers to the car.

Good job though, the clear is nice and glossy :D
User avatar
bas
Grease Monkey
Posts: 162
Joined: Sun May 31, 2009 5:00 pm

Re: Finished bumber respray :)

Post by bas »

I didn't use a clear
User avatar
Tippin
Oldtimer
Posts: 1663
Joined: Wed Feb 27, 2008 6:00 pm
Location: Sydney

Re: Finished bumber respray :)

Post by Tippin »

ohh lol, must just be the lights.

why didnt you use clear? :lol:
User avatar
rock_it
Oldtimer
Posts: 6599
Joined: Sun Jun 10, 2007 5:00 pm
Location: The Shire .. NSW
Contact:

Re: Finished bumber respray :)

Post by rock_it »

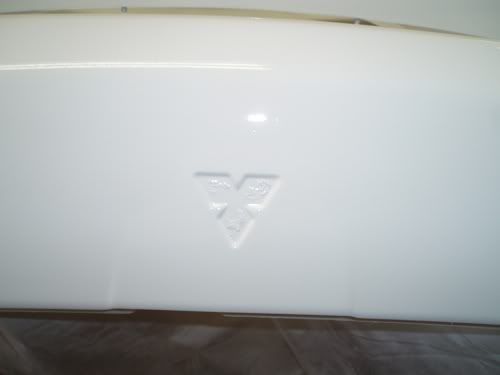
Tippin wrote:Its to do with the way the paint pigments settle down on the surface.

You may notice a colour difference when you compare your bumpers to the car.
This
I just had to add it ......
sublime19 wrote:Lol clearly you don't know me well enough, it was a joke :roll:
I talk a lot of sh*t, usually have to keep a roll of toilet paper handy in the car for my mouth :lol:
Astron_Boy wrote:Hold me Sooty, I need man comfort.
:utbnb:
User avatar
Sweep
Grease Monkey
Posts: 379
Joined: Wed Jul 07, 2010 7:42 pm
Location: QLD

Re: Finished bumber respray :)

Post by Sweep »

Nice job what sort of equiptment did you use to spray with?
User avatar
bas
Grease Monkey
Posts: 162
Joined: Sun May 31, 2009 5:00 pm

Re: Finished bumber respray :)

Post by bas »

Well i borrowed a compressor from my GF's dad which was pretty big dunno what capacity though.

And i bought a cheap SCA gravity fed gun from an auto shop forgotton which one but it was 50% off so got it for $50 :D
i didnt use any extra moisture absorber at the gun or a pressure dial at the gun either, haha just the one at the compressor.
User avatar
Supplanter
Forum Moderator
Posts: 6422
Joined: Tue Oct 22, 2002 5:00 pm
Location: Arizona Bay
Contact:

Re: Finished bumber respray :)

Post by Supplanter »

SCA = Supershit Auto.

http://www.supercheapauto.com.au
LED ALL the things.
User avatar
Tippin
Oldtimer
Posts: 1663
Joined: Wed Feb 27, 2008 6:00 pm
Location: Sydney

Re: Finished bumber respray :)

Post by Tippin »

Supplanter wrote:SCA = Supershit Auto.

http://www.supercheapauto.com.au
lol ^^^

depends what quality your going for, i still use a supercheap gun for my primer but then i switch to my $600 gun for my colour & clear
User avatar
Sweep
Grease Monkey
Posts: 379
Joined: Wed Jul 07, 2010 7:42 pm
Location: QLD

Re: Finished bumber respray :)

Post by Sweep »

bas wrote:Well i borrowed a compressor from my GF's dad which was pretty big dunno what capacity though.

And i bought a cheap SCA gravity fed gun from an auto shop forgotton which one but it was 50% off so got it for $50 :D
i didnt use any extra moisture absorber at the gun or a pressure dial at the gun either, haha just the one at the compressor.
Cool, looks like it came out really nice.
Where abouts did you get the paint from?
Post Reply