Page 1 of 1

An update to my interior

Posted: Fri Nov 21, 2008 10:19 pm
by dstocks
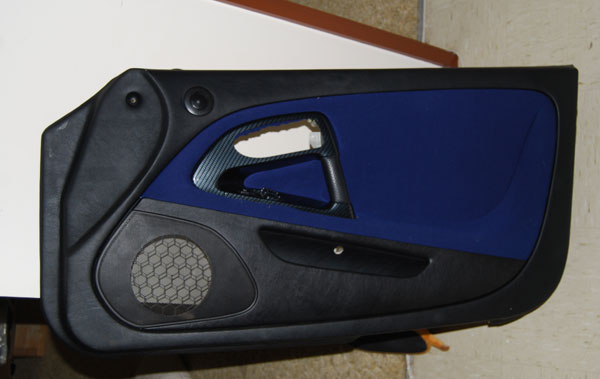
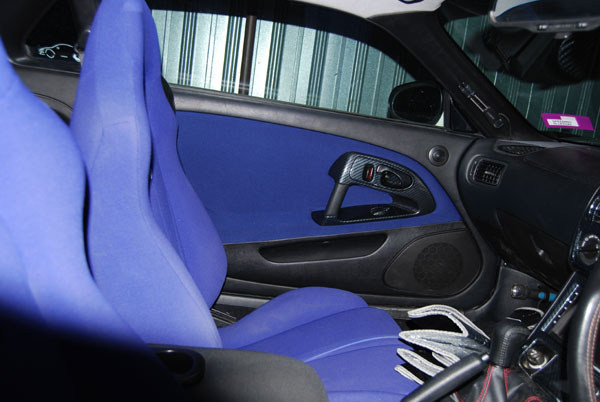
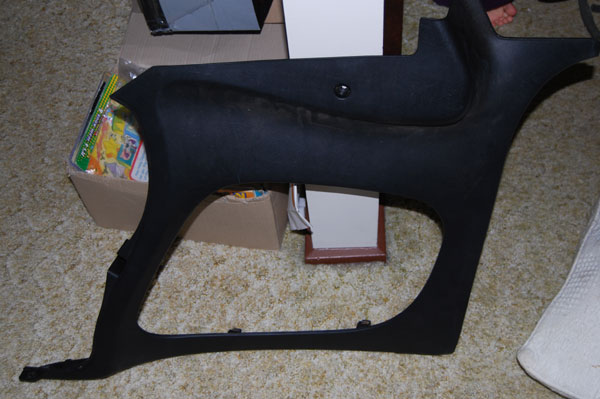
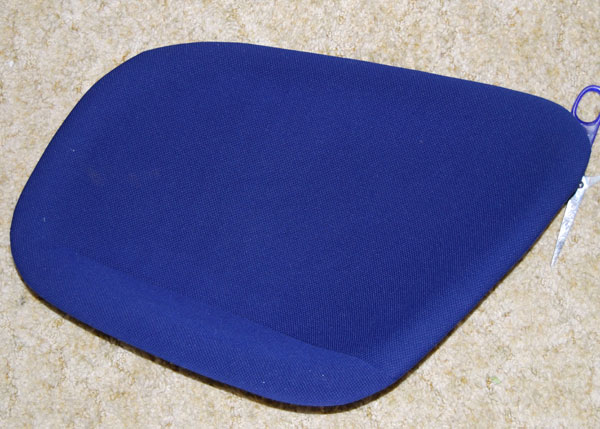
Finally got my door linings done. Had to hack them up with a jigsaw before they got covered and then put them back together with fibreglass. have fitted the front ones tonight. The rears will follow tomorrow

What do you think....

Image
Image
Image
Image
Image

Posted: Fri Nov 21, 2008 10:22 pm
by xSlurpee
your work always seems to amaze me dwayne :D

Posted: Fri Nov 21, 2008 10:42 pm
by dstocks
Oh, I may have cut the pieces out for both front and back and fibreglassed them back together, but I paid for the upholstery job. Dont know one end of a sewing machine from the other and I think thats a good thing :lol:

Posted: Sat Nov 22, 2008 12:37 am
by Shahrez
Looks mint mate! How much did the upholstery job cost?

Posted: Sat Nov 22, 2008 12:42 am
by RallyMad
looks great dstocks

Posted: Sat Nov 22, 2008 6:53 am
by dstocks
$330, but I supplied the material. You wouldnt believe how hard it is to come up with a good match for the version R seat material.

Posted: Sat Nov 22, 2008 9:11 am
by I8A4RE
Looks awesomw suuits the car very nicely.

Just brought my misses a sewing machine for her bday today. Guess whats first on the list :lol:

Posted: Sat Nov 22, 2008 6:41 pm
by RallyMad
I8A4RE wrote:Just brought my misses a sewing machine for her bday today. Guess whats first on the list :lol:
:lol:

dstocks, are you going to do a DIY for us? I'm just interested in how you went about the cutting and were and then the fibreglassing. Mainly cause my glassing skills are crap :(

Posted: Sat Nov 22, 2008 7:33 pm
by vipfto
love it mate hot 8)

Posted: Sat Nov 22, 2008 8:30 pm
by dstocks
Ill give it a bit of a shot, but I didnt take progress photos(regret that now), so itll be a little hard to explain

Cutting out the pieces

OK, what youll need to do this:

- Drill with about a 2mm bit
- Jigsaw
- Rotary sanding bit on a drill (made of bits of sandpaper). Bunnings sell them. Alternatively, a dremmel witha similar attachment does the trick. This is what I used.

Front door:

Step 1 - remove the door lining. There are a few guides on Complete FTO that show how to do this from memory, so ill be lazy and not do it again

Step 2 - Remove the door handle and the pocket/speaker cover by removing all screws on the back of the lining. Once this is done, your lining should resemble the one below (without the red)

Image

Step 2 - Drill a pilot hole where the red circle is marked and elongate it so there is enough room to fit the jigsaw

Step 3 - Jigsaw around the bit marked in red. Take your time and make sure you stay in the valley. As you are not recovering the outside bit is is of the utmost importance not to damage that bit.

Back panel

Same process applies for the back panel. The picture below shows where to cut (Again, take your time). The pilot hole is a little tricker on this one as there is no spot that is going to be hidden by a cover, so it has to be neat:

OK, youve cur out the bits, now you have to tidy up the edges. Make it consistent and take your time. The more time you spend getting this right, the better the result.

Image

Cleaning up the ridges and keying the surfaces

OK, I used an angle grinder with a sanding disk and a wire disk drill attachment for this bit.

Using the angle grinder, remove all the ribs from within 3 cm of each side of the cut you made. You need to do this to make the fibreglassing a s$%t load easier. Once youve done this on all panels, use the wire bit on the dril to scuff the surface on both sides of the cut. This provides a better surface for the fibreglass to stick to.

Upholstery

I cant tell you how to do this bit, but source your material and choose an upholster and drop the bits off to be done[/b]

Fibreglassing

OK, gotta say this bit worried me quite a bit as I had just spent a packet and didnt want to stuff it up, but in the end, it worked just fine. Youll need

- A roll of 2 inch masking tape (get reasonable quality - its protecting your material)
- A square metre of fibreglass matting. I got the thicker of the two choices.
- A litre of resin and the appropriate amount of catalyst.
- A pair of scissors
- A large screwdriver

OK, this bits a little tricky. You need to put the bits back together and mask the join (covering all material. The idea is to fibreglass over the masking tape (it works a treat). Make sure thatthe bits are aligned with one another properly as once its set, there is no going back.

Step 1 - Cut strips of fibreglass about 8cm wide and long enough to fit. Do NOT fibreglass over any of the screw holes. Mix the fibreglass and apply a bit at a time. I found that as the join is not flat, my fibreglass kept lifting and I had to keep pushing it down again. On the back panel this isnt so important but on the front panel, there isnt a lot of clerance. I actually have to shave a bit of the fibreglass off on the top of the front panels as protrudes a little too much. I dont anticipate that this will be an issue though.

I think that pretty much covers it. If anyone has any further questions, happy to answer them.

GOOD LUCK! ;)

Posted: Sun Nov 23, 2008 7:36 am
by aza013
That looks HOT well done

Posted: Sun Nov 23, 2008 2:01 pm
by rock_it
Looks great mate ... Love it ...

Posted: Thu Nov 27, 2008 5:14 pm
by RallyMad
Thanks for that dstocks.

The fibreglassing is on the masking tape that covers the fabric to the door frame (the cleaned area correct? on the back side?

Posted: Thu Nov 27, 2008 8:37 pm
by dstocks
Yeah,

You need to stop the fibreglass resin bleeding through the fabric and showing on the front. If you cover the join on the back with masking tape and then fibreglass over it, it does the trick.

Only problem with the whole thing is youre as high as a kite for the next week or so while driving until the fibreglass smell starts to dissipate.

Posted: Thu Nov 27, 2008 11:24 pm
by ft04me
one of my mate has his own business of doing car interior and boats...

he used to work for G-Trim before they went bankrupt and now he opened up his own business... he was gonna do my front doors in red leather (not pleather - platic leather) treated with UV protection for $50 per door...

now i dont know if he still does it as i havent seen him in ages... (GOD DAMN UNI)

but now that im working full time again during the holiday i'll be doing up my fto too

... BTW dwayne i always love your work...specially the vents...im thinking of doing it to mine before i do a whole body respray...

Posted: Tue Dec 02, 2008 1:18 pm
by koolio1234
great stuff mate...looks HOT. i wanna do white leather inserts :D as my upholstery is already done to a white leather.

Re: An update to my interior

Posted: Mon Sep 17, 2012 1:28 am
by ObsidianRadio
Jesus f**king christ, I love this! I'm a little scared to attempt this though as I've actually NEVER used a jigsaw before. :/

Re: An update to my interior

Posted: Mon Sep 17, 2012 2:38 am
by spetz
Looks great Dwayne.
Is the color a perfect match, as in the pics it looks ever so slightly off?

Also, what did the door trims look like stock?

Keep up the great work ;)