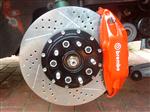
Just thought i would outline the clutch change i did on boxing day (yes i know i left it a while). I couldnt really justify spending $600-$800 to have someone change the clutch on my '95 gpx so i tackled it on boxing day with my mate and my dad.
First off, i pity anyone who doesn't have access to a hoist and a nice flat surface to work on. You could probably get away with a decenent set of high axel stands but remember you ideally want to pull the gearbox right out.
I had originally planned to take a few photos but like with all projects you get wrapped up in it and you really dont care about the photos at that point.
It took us about 9 hours in total and the workshop manual isnt terribly helpful. Here is the process we followed
Hoist it up
Drain all of your fluids to be safe, but transmission oil is the only important one
remove:
<li>Battery</li><li>battery holder</li><li>Airbox and associated hoses</li><li>gear selector assembly, this just has a few metal slides that pull out and you can remove the cable a bit like disconnecting the brake on a bike</li><li>unbolt clutch hydrulics, including cylinder and line
Whilst all of that is going on you can have someone making a start on removing the drive shafts
<li>drop the bottom suspension arm and disconnect all of the bolts, split pins etc associated with the stub shaft</li><li> pull the stub shaft out of the suspension assembly</li><li> pop the other end of the stub shaft free from the differential with a prybar, a bit of light even force should have it pop out into your hands</li>
now things get a little hairier as you need to start disconnecting the gearbox from the motor. We had a forklift with a winch to help us hold up the engine but i cant see why a standard engine crane wouldn't be a problem. The mounting point is on the battery of the front cylinder bank
Once you have that on and under load its time to start disconnecting the engine mounts. The big black bar that runs under the engine from back to front should come off first, it will take two mounts with it. With that out of the way you will need to get a transmission jack in there, or at trolley jack of some sort with a plate on the top to support the gearbox. Strap it down tight, just don't do what i did and leave enough room for the ratchet strap to be undone again without cutting it off.
Undo the last engine mount, 4 bolts near the battery compartment area. then there is a great number of bolts to come off the bell housing, including the bolts that hold the starter motor on. We had no reason to disconnect the exhaust system though, you can just leave the starter motor hanging in there.
If everything is now undone it should be hanging off the hoist/crane/block and tackle and the transmission jack should be supporting it from below
slowly drop the whole assembly so the gearbox has room to start wiggling itself free, the shaft isnt very long so it should pop out quickly, it is then just a case of getting that gearbox right out of the way and making sure you dont bump its orientation.
from here it is pretty straight forward, unbolt the pressure plate, remove the clutch and pray it all goes back together again. As i understand the FTO is a little different to most cars as the spline shaft of the gearbox does not have a bearing or a bush to support it inside the motor, this can make realigning a little tricky. The only major hurdle here can be if the flywheel needs machining, i was lucky (although my dad is a machinist) the surface was fine.
When reassembling with the new clutch there is a small sheet metal assembly that is attached to the fly wheel, we assume this is used to align the clutch. We assume this because we actually broke it before we started to reassemble it and we were a little concerned as to its function but due to the lack of bearing or bush this was the best explanation we could come up with as it doesn't look to have had any physical wear on it.
we instead aligned the clutch off the fingers, pinched the bolts that hold the plate on and took the aligning tool out so as the fingers didn't close in on it. The thrust bearing is a 5 second job.
the part that probably took the longest was getting the gearbox back onto the motor, we had one person moving the crankshaft around, there is a 1/2inch socket fitting onto the accessory belt assembly that can be accessed from the RHS wheel arch, those clever Japanese even left a nice little access hole through all of the plastic. we had another person pushing and maneuvering the gearbox and a third shouting alignment directions from underneath.
From here you can basically just repeat your disassemble steps and bolt everything back together. Then when you turn the engine over a few hours later you hope it all went back where it was supposed to.
I hope that provides people with a little bit of an insight into what it takes to change a clutch. There is probably a few things i have left out but i think that covers the main parts.
Clutch Change
Moderators: IMC, Club Staff
-
Apothus

- Apprentice
- Posts: 44
- jedwabna poszewka promocja
- Joined: Sun Nov 25, 2007 6:00 pm
-
brad_gpx

- Veteran Mechanic
- Posts: 1128
- Joined: Mon Aug 17, 2009 5:00 pm
- Location: central coast
-
vanadinite

- Veteran Mechanic
- Posts: 809
- Joined: Fri Apr 26, 2013 2:13 am
- Location: Brisbane
Re: Clutch Change
Do you know what the torque settings for the clutch and gearbox are? cheers
EDIT: Found it, seek and you shall find lol, thanks
EDIT: Found it, seek and you shall find lol, thanks
-
Vectose

- Forum Moderator
- Posts: 3952
- Joined: Sun Nov 28, 2010 8:45 pm
- Location: Newcastle
Re: Clutch Change
Download the workshop manuals from http://ftoaustralia.com/downloads
They have all the details you need.
They have all the details you need.
Bennoz wrote:A whoooole lot 'o jismTechnikhaus wrote:What is in said Bens big penis by the way?
-
Bennoz
- National President
- Posts: 23676
- Joined: Fri Jan 21, 2005 6:00 pm
- Location: Sydney
- Contact:
Re: Clutch Change
Just realised the gearbox manual was not up there, so I've just uploaded it.
http://ftoaustralia.com/downloads/Gearb ... _F5M42.zip
http://ftoaustralia.com/downloads/Gearb ... _F5M42.zip
-
destinationtoby
- Broke it
- Posts: 3503
- Joined: Sat Nov 24, 2012 11:05 pm
- Location: mid north coast
Re: Clutch Change
What's a clutch 
Because nothing is faster than a p plater in a commodore.....
except maybe a p plater on a unicorn
except maybe a p plater on a unicorn
FTOcrazy273 wrote: Destinationtoby probably has one of THE best FTO's on the forum I never get tired of looking at his pics! Good work mate!
-
Bennoz
- National President
- Posts: 23676
- Joined: Fri Jan 21, 2005 6:00 pm
- Location: Sydney
- Contact:
Re: Clutch Change
destinationtoby wrote:What's a clutch

-
vanadinite
- Veteran Mechanic
- Posts: 809
- Joined: Fri Apr 26, 2013 2:13 am
- Location: Brisbane
Re: Clutch Change
Just so i make sure im reading it write, can anyone confirm the torque settings for the transmission to the engine? my interpretation is the transmission case - clutch housing is what im looking for, it lists the torque setting as 44nm, does this sound right?
-
vanadinite
- Veteran Mechanic
- Posts: 809
- Joined: Fri Apr 26, 2013 2:13 am
- Location: Brisbane
Re: Clutch Change
Can anyone confirm this is the correct seal for the gearbox side rear main seal on mivec engine
http://mitsubishi.epc-data.com/fto/de3a ... 2920,2921/
PN MD359158
Cheers
http://mitsubishi.epc-data.com/fto/de3a ... 2920,2921/
PN MD359158
Cheers
-
Astron_Boy

- Trolling Gen Y
- Posts: 8400
- Joined: Sun May 27, 2007 5:00 pm
- Location: Wine Country NSW
- Contact:
Re: Clutch Change
Looks to be the one!vanadinite wrote:Can anyone confirm this is the correct seal for the gearbox side rear main seal on mivec engine
http://mitsubishi.epc-data.com/fto/de3a ... 2920,2921/
PN MD359158
Cheers

-
silverGPX
- 9.5"
- Posts: 6793
- Joined: Tue Oct 13, 2009 5:00 pm
Re: Clutch Change
vanadinite wrote:Just so i make sure im reading it write, can anyone confirm the torque settings for the transmission to the engine? my interpretation is the transmission case - clutch housing is what im looking for, it lists the torque setting as 44nm, does this sound right?
Tight as f**k
-
Bennoz
- National President
- Posts: 23676
- Joined: Fri Jan 21, 2005 6:00 pm
- Location: Sydney
- Contact:
Re: Clutch Change
This ^^^
-
Sahin

- HULK
- Posts: 5519
- Joined: Wed Oct 05, 2011 10:38 pm
- Location: Up to me nuts in boys guts
Re: Clutch Change
Tighter than shaddowwarrior!
-
Astron_Boy
- Trolling Gen Y
- Posts: 8400
- Joined: Sun May 27, 2007 5:00 pm
- Location: Wine Country NSW
- Contact:
Re: Clutch Change
You know.....Sahin wrote:Tighter than shaddowwarrior!
Meanwhile Van, if you want the seal, I am placing an order with Amayama, just reply to the thread in the General area and I'll order it.
-
shadowarrior

- Tightarse
- Posts: 2703
- Joined: Thu Oct 27, 2011 4:48 pm
- Location: Gold Coast
Re: Clutch Change
Wtf?!?!?!
-
vanadinite
- Veteran Mechanic
- Posts: 809
- Joined: Fri Apr 26, 2013 2:13 am
- Location: Brisbane
Re: Clutch Change
Thanks for the offer mate but i sourced them today from Auto 1 in ipswich. Cost a bit more than amayama but I need to do the gearbox swap this afternoon cause my current one is f**cked.Astron_Boy wrote:You know.....Sahin wrote:Tighter than shaddowwarrior!
Meanwhile Van, if you want the seal, I am placing an order with Amayama, just reply to the thread in the General area and I'll order it.
And tight as f**k by hand or rattle gun? haha