
<br><b>Consumables</b>
<li>500g of Glass Fibre Filler ($16.99)
<li>5x Sheet of 60 Grit Sand Paper ($4.00)
<li>2x Sheet of 600 Grit Wet & Dry Sand Paper ($2.20)
<li>Disposable Face Mask ($3) <br><b>Tools</b>
<li>None<br>
<b>Misc Junk</b>
<li>Disposable Gloves
<li>Spatula or Butter Knife
<li>Take Away Container Lid
<br><b>Total Cost:</b> ($26.19)
<b>.:Disclaimer:.</b>
This is a guide i have written to be used as a supplementary resource to people wanting to do their own fibre glass work. Fibre glass is harmful to the body, avoid contact with skin, eyes and avoid breathing it in, unless you want to die or get seriously injured or ill. Also fibre glass once its structural integrity is damaged, it is very difficult to restore it to its original form, I can not guarantee that this will work, it is merely a recount of what I have done. No liability can be accepted for any loss, damage or injury caused by undertaking this guide.
Follow this guide at your own risk.<br>
<br>
<b>.:Introduction:.<br></b>
These are instructions on how to repair damaged fibre glass body kits, such as
cracks and splits. If you master the art of repairing fibre glass cracks, you
can almost make it seem that it was never cracked, and you could even move on to
create your own body kits, but that's not what I'm covering today. If your fibre
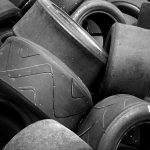
glass body kit looks like the one I have below then continue. Sorry about the
bad photos, I didn't realise the camera was on night vision.<br>


<br>
<b>.:Step 1 - Removing the damaged part:.</b>
Take off the damaged panel, each panel is different so I can't really explain
this, but it will make it easier if you take it off, in the case of the Veilside
front bar for the FTO, it can be taken apart into two separate parts, isolate
the damage part as much as you can it will make life easier, in this case it was
the lip of the Veilside bar.<br>

<br>
<br>
<b>.:Step 2 - Sanding:.</b>
Sand the damaged section with a the 60 grit sand paper to clean the area as much
as you can, your trying to get rid of all the flaking paint, indent it somewhat
so that you can fill it up with fibre glass filler later. You can neglect the
back of the wound because no one sees that anyway.<br>


<br>
<br>
<b>.:Step 3 - Preparing the Filler:.</b>
A) Now you are ready to prepare the fibre glass filler. Squeeze a bit of harder
onto the take away container lid like so. (The more hardener you use the quicker
the filler dries, it is also dependent on outside temperature, too much harder
and the filler will dry up before you can even apply it, not enough and you
could be waiting 24hours for it to dry)<br>

<br>
B) Now knead the hardener till it becomes a smooth paste with a spatula (I used
a butter knife), adding the filler into the hardener tray. It is recommended
that you add 50 parts filler for 1 part hardener there is (how are you meant to
measure this anyway). Knead it till it is all one colour.<br>

<br>
<br>
<b>.:Step 4 - Applying The Filler:.</b>
Now you are ready to apply the filler, put on your gloves, because the filler is
very stringy and thick, so I found it easier to apply with the gloves on rather
than trying with the knife, apply the filler with pressure onto the damaged
section, avoiding air bubbles as to maximise strength, apply plenty to the back
of the crack, to reinforce it and give it some extra strength. Add a few more
layers building it so its slightly higher than the surrounding area.<br>


<br>
<br>
<b>.:Step 5 - Sanding:.</b>
Now this is the annoying part, equip your face mask, as begin sanding down the
exposed surface with 60 grit sand paper till your happy with your result, then
smooth it out with the Wet & Dry sand paper.<br><br><br>
<b>Gratz, you've just repaired your own fibre glass body kit.</b>