diy pre-facelift clear fog lights
Moderators: IMC, Club Staff
-
Fabio
- Newbie

- Posts: 8
- jedwabna poszewka promocja
- Joined: Thu Nov 17, 2005 6:00 pm
diy pre-facelift clear fog lights
does anyone know how to make clear fog lights for the pre-facelift fto?
-
BuCkEt
- Oldtimer
- Posts: 1544
- Joined: Mon Nov 01, 2004 6:00 pm
- Location: Canberra
-
NorthQLDFTO
- Grease Monkey
- Posts: 252
- Joined: Sat Jan 29, 2005 6:00 pm
- Location: Townsville, North Queensland
For those who have done this...
Best temperature to set the oven to?
AND
Roughly how long do the lights need to be in the oven?
Best temperature to set the oven to?
AND
Roughly how long do the lights need to be in the oven?
If I Had A Dollar For Every Time Someone Said "If I Had A Dollar For Every Time Someone Said <...>" Well... Then... I'd... Have A Dollar For Every Time Somone Said "If I Had A Dollar For Every Time Someone Said <...>"!!!
-
umm
- Grease Monkey
- Posts: 279
- Joined: Thu Jun 24, 2004 5:00 pm
- Location: Queensland-Morayfield
i used the lowest temp that my oven went to, which was around 70 degrees(i'd go lower if you can). Had them in there just long enough so they were cool enough to pick up, but if you held them for a few seconds they'd start to burn you. Just put them in and keep checking them and trying to pull them apart, if you can't then put them back in and keep trying. do it slowly. i used 2 butter knives to pull the peices apart. Although this did damage the plastic housing a bit, but you can't see it when they're on the car. hope that helps. 
-
NorthQLDFTO
- Grease Monkey
- Posts: 252
- Joined: Sat Jan 29, 2005 6:00 pm
- Location: Townsville, North Queensland
-
shakey
- Approved FTO Australia Trader
- Posts: 41
- Joined: Tue Jan 25, 2005 6:00 pm
- Location: Birmingham UK

-
shakey
- Approved FTO Australia Trader
- Posts: 41
- Joined: Tue Jan 25, 2005 6:00 pm
- Location: Birmingham UK
umm wrote:I didn't just smash out the orange like this cos i wanted it open so i could spray the inside chrome. looks mad i reckonWhat about trying this
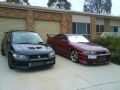
What do you think that would look like on a Yellow FTO? I already have a set of headlights split and sprayed silver that I was going to fit into the wifes car but I may just fit them to mine and do this mod
Very nice car BTW
-
shakey
- Approved FTO Australia Trader
- Posts: 41
- Joined: Tue Jan 25, 2005 6:00 pm
- Location: Birmingham UK