Re: Side Repeater Group Buy
Posted: Tue Sep 13, 2011 12:36 am
I want the smoked ones 
Welcome to the f**king old FTO Australia forums!!
https://www.ftoaustralia.com/v3/
consider it doneGholdwayne wrote:I want the smoked ones
Yours was sent in the first batch which has been posted on Friday just gone so you should get them very soon.Taiwo wrote:yea so what is the ETA on this babies.
I do hope that you are joking.bass_twitch wrote:I just received mine in the postthey look good, but where's the DIY of how to install?
These have to be modded to fit...aza013 wrote:I do hope that you are joking.bass_twitch wrote:I just received mine in the post
You should not need a DIY to put them in.
Pop old ones out unplug, plug in new ones and push back in.
Well that has to suck then, plug and play for the winrock_it wrote:These have to be modded to fit...aza013 wrote:I do hope that you are joking.bass_twitch wrote:I just received mine in the post
You should not need a DIY to put them in.
Pop old ones out unplug, plug in new ones and push back in.
Not like our ones ...
Alanperu wrote:Here is yet another way of creating clear side repeaters!
I was originally planning to saw the backs off both pairs and stick them together (as per NobbyV4's how to), but when I removed my original repeater and compared it to the MX5 version I was surprised at how similar they were.
There are 2 main differences from the MX5 repeater to the orange FTO repeater. They are:
1) The notches cut out of the back where the bulb holder fits.
2) The FTO repeater clips in at the top (using a V-shaped groove) and bottom, whereas the MX5 repeater only clips in at the bottom.
I figured that I could just solve these 2 differences, rather than saw them in half!
I didn't have my camera when I originally did this, but hopefully you can see from the finished pictures what I was trying to achieve.
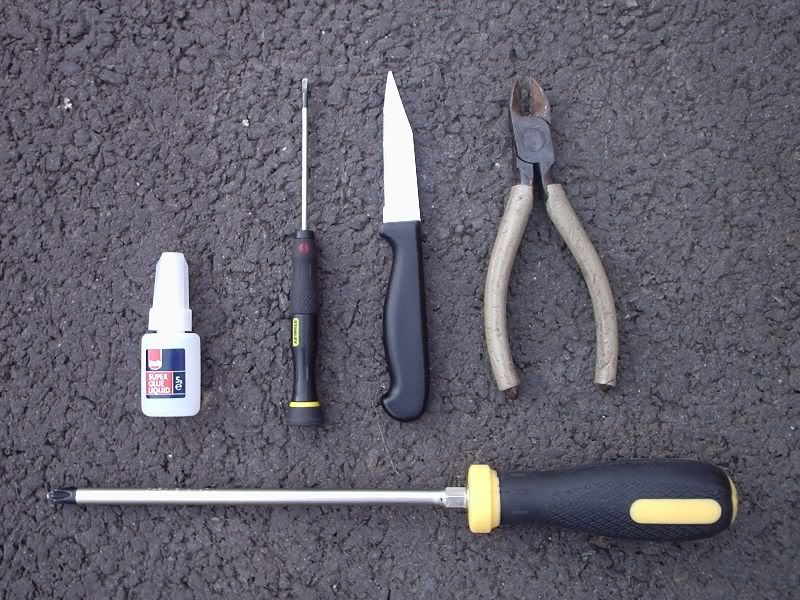
First the tools:
Ok, so here are the steps.
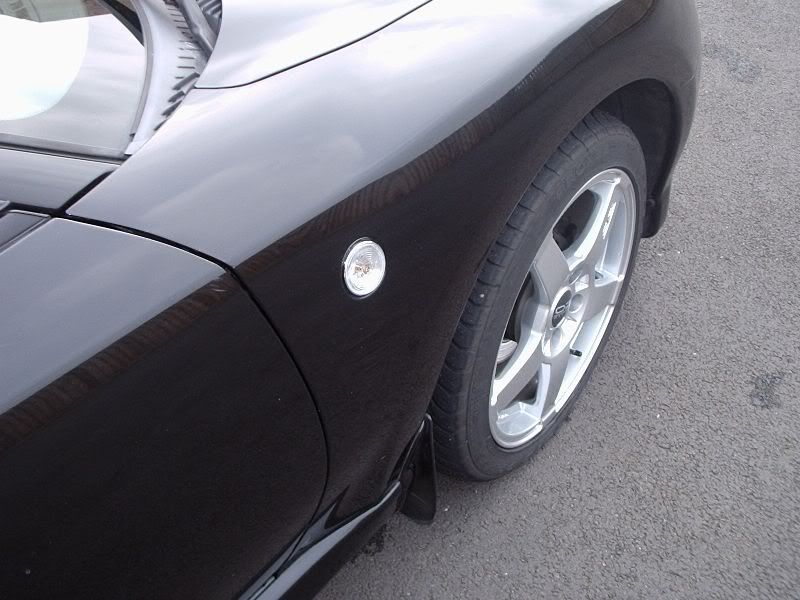
1) Open the door as wide as you can so you can see the repeater in the wing, then use a long screwdriver (or equivalent) to push the retaining clip upwards it should then pop out at the bottom and you can pull the whole unit out.
2) Remove the bulb holder - it's a simple twist and pull out.
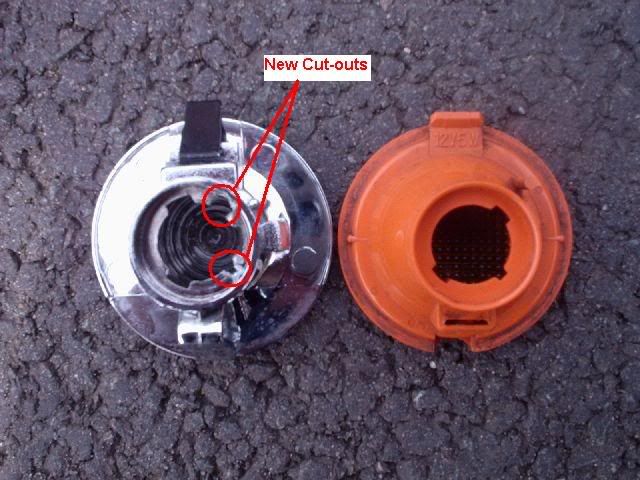
3) Next you need to add extra cut-outs for the bulb holder to your MX5 repeater. I used the wire cutters here to pinch and soften the plastic and then used the serrated knife to do the rest.
4) Then you need to remove the old retaining clip from the orange repeater. To do this bend the clip back so that you can see the metal flap underneath (used to secure the clip) and use the small screwdriver to push this down so you can pull the clip out.
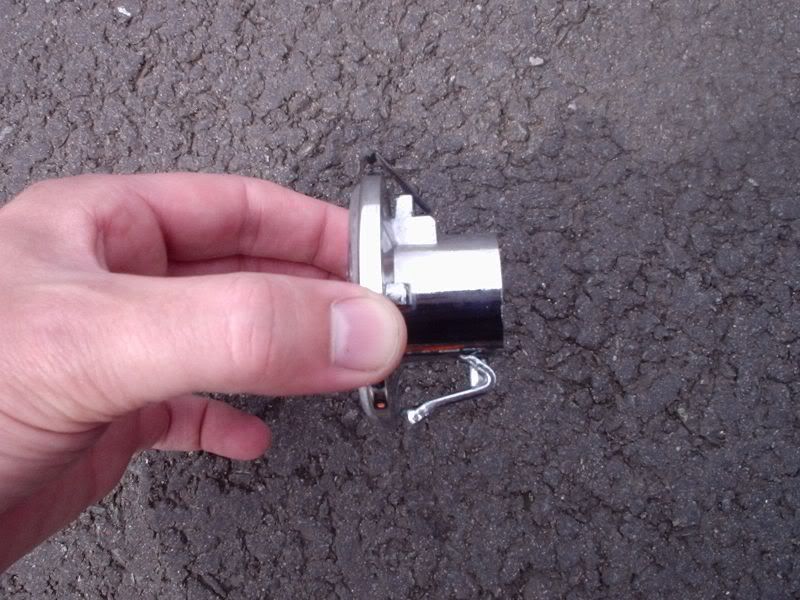
5) You are going to use this clip to secure the MX5 repeater at the top. To do this you need to make a slit in the top section of the MX5 repeater so you can slide the retaining clip through. I used the knife again to do this. It takes a while (about 10 mins per repeater) but if you have Dremel (other small multi-functional power tools are available) you may be able to do this in seconds.
6) Once you have done this, I would advise testing it works. As long as the clip is fairly secure in the repeater (without needing glue) you can refit the repeater without any problems - you may need to play with the angle of the clip slightly, but the pressure on the clip should keep it firmly in place (see below for how my one looks).
Also refit by hooking the top in first then push the bottom in and it should click in nicely.
7) Now remove repeater again and the retaining clip and go and clean out the inside of the repeater as it will have lots of bits of plastic in it. I just ran it under the tap giving it a good shake. Then pushed some kitchen roll in to dry it out. Then I gave it a quick blast with the hair-dryer to make sure all the water had gone.
8- Now glue the retaining clip to the repeater - easy.
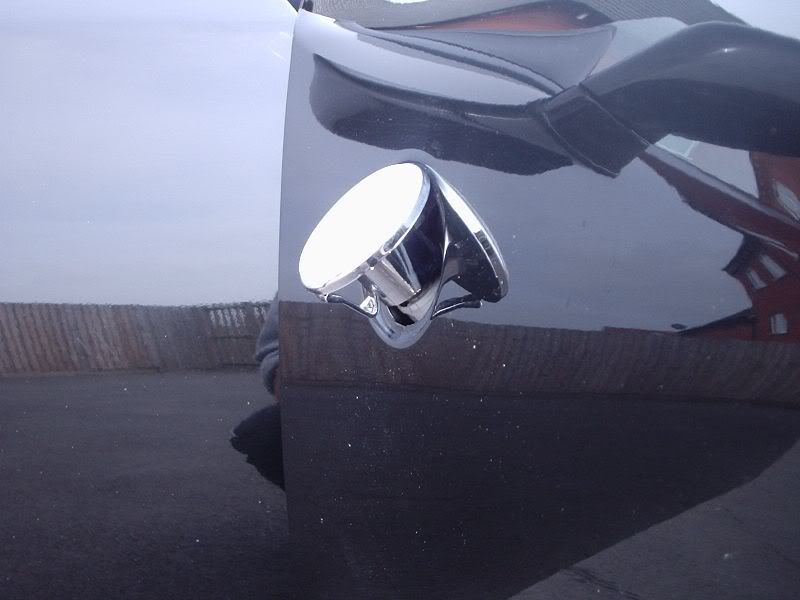
9) Once dried, refit and admire your work.
I know this is a bit of overkill as there are already a few ways to do this, but I haven't seen this method mentioned before.
Hope it can help a few of you in the future.
Cheers.
aza013 wrote:Well that has to suck then, plug and play for the winrock_it wrote:These have to be modded to fit...aza013 wrote:I do hope that you are joking.bass_twitch wrote:I just received mine in the post
You should not need a DIY to put them in.
Pop old ones out unplug, plug in new ones and push back in.
Not like our ones ....
I take back my statement then.
Does it differ from the above?FTO Works wrote:Sorry for not getting the guide up just yet guys ive been having a problem with my broad band at home and wasnt able to get back on the internet till i got into work this morning.
I was going to post up the guide now but Bennoz has found one
I do have a word document of the guide if anyone wants one emailed
Its similarbass_twitch wrote:Does it differ from the above?FTO Works wrote:Sorry for not getting the guide up just yet guys ive been having a problem with my broad band at home and wasnt able to get back on the internet till i got into work this morning.
I was going to post up the guide now but Bennoz has found one
I do have a word document of the guide if anyone wants one emailed