Robs new project Supercharger
Moderators: IMC, Club Staff
-
Rob Furniss
- Oldtimer
- Posts: 1394
- jedwabna poszewka promocja
- Joined: Wed Jan 19, 2011 11:32 pm
- Location: Perth
- Contact:
Re: Robs new project Supercharger
Thanks mate, I started welding the core to it last night but it was a pain getting enough heat into it, then I ran out of mapp gas which i'm hoping is why I couldn't get enough heat into it. Will pop to toolmart later this morning to get some more gas and then crack on again.
-
Rob Furniss
- Oldtimer
- Posts: 1394
- Joined: Wed Jan 19, 2011 11:32 pm
- Location: Perth
- Contact:
Re: Robs new project Supercharger
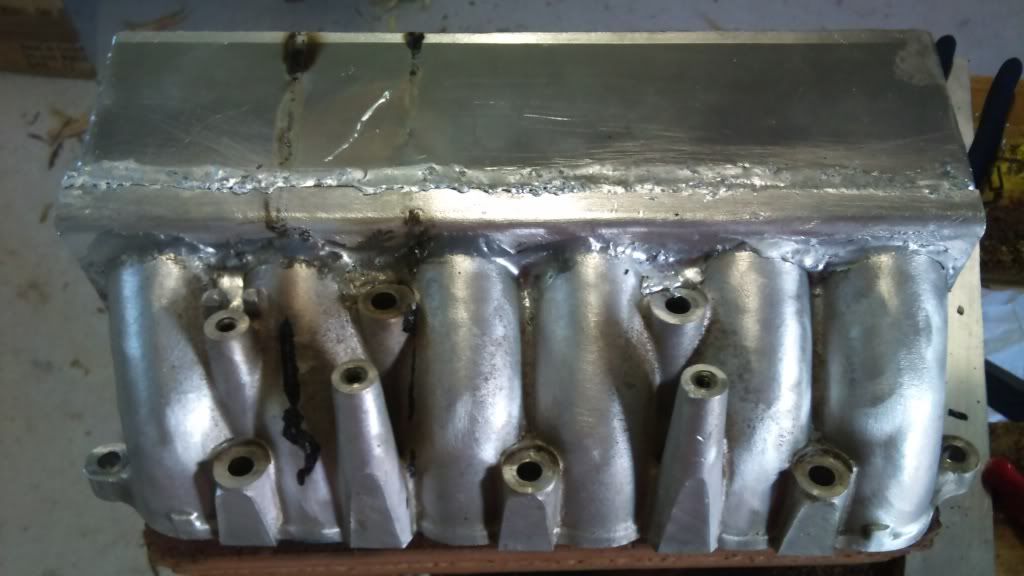
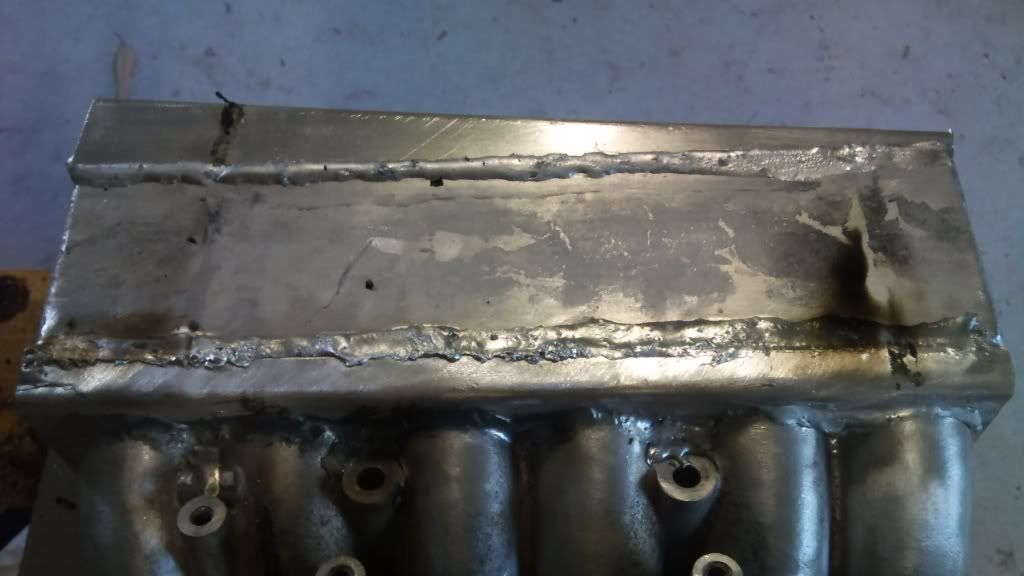
Welding the core on was harder than I thought, it just didn't want to take.
I think the problem was I was heating up the area around the join and should have been heating up more of the core due to it's mass and ability to disipate heat, the rod was melting and taking well to the flange but that's thinner and it wasn't penetrating the core. Seemed better when I moved the torch flame more onto the core back from the join and then let the heat creap towards the join from the core if you know what I mean.
I only have 1 rod left now and these ones only arrived yesterday, I hope my ones from the US arrive soon as I still have to weld the intake end tank on and the water end tanks.
Here's some pics although they aren't pretty:
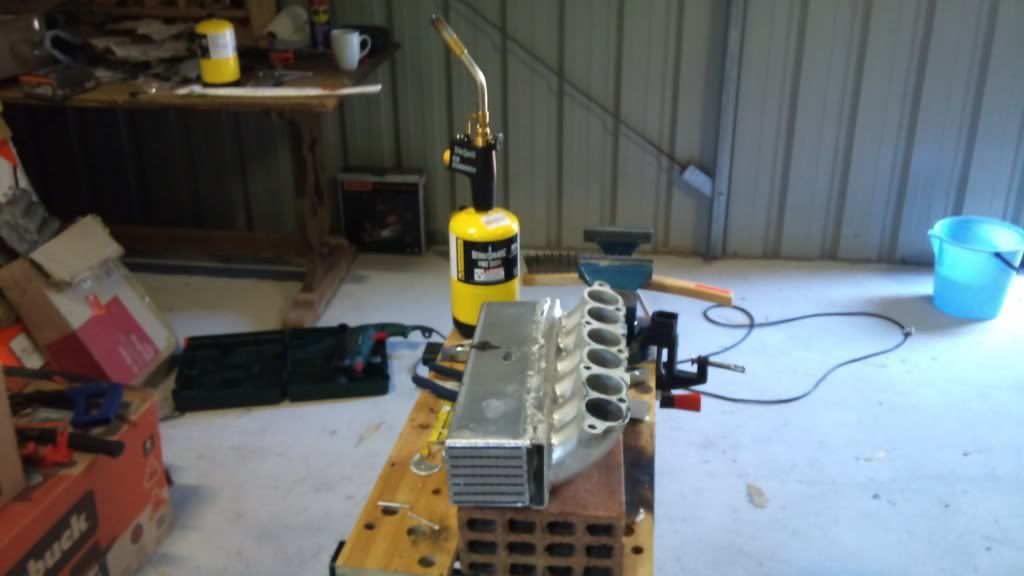
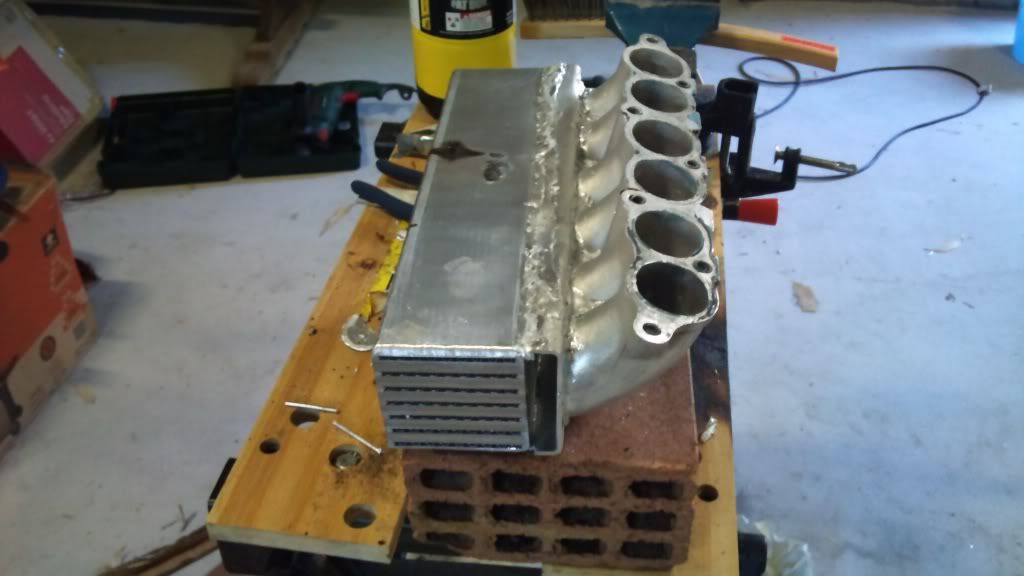
I struggled clamping it together, in fact failed and only used a couple of bits of wire wrapped around - still with the insulation sleeve on hence the brown mess on the underside.
When it cools I will turn it over and snap a pic of the top, think the weld is a bit prettier on that.
I think the problem was I was heating up the area around the join and should have been heating up more of the core due to it's mass and ability to disipate heat, the rod was melting and taking well to the flange but that's thinner and it wasn't penetrating the core. Seemed better when I moved the torch flame more onto the core back from the join and then let the heat creap towards the join from the core if you know what I mean.
I only have 1 rod left now and these ones only arrived yesterday, I hope my ones from the US arrive soon as I still have to weld the intake end tank on and the water end tanks.
Here's some pics although they aren't pretty:
I struggled clamping it together, in fact failed and only used a couple of bits of wire wrapped around - still with the insulation sleeve on hence the brown mess on the underside.
When it cools I will turn it over and snap a pic of the top, think the weld is a bit prettier on that.
Last edited by Rob Furniss on Wed Feb 08, 2012 7:31 pm, edited 1 time in total.
-
Astron_Boy

- Trolling Gen Y
- Posts: 8400
- Joined: Sun May 27, 2007 5:00 pm
- Location: Wine Country NSW
- Contact:
Re: Robs new project Supercharger
Well, it's a result none the less.
provided the welds are solid and there are no bubble gaps or pin holes then job done.
Run a small dremmel brush over it and you'd never know.
provided the welds are solid and there are no bubble gaps or pin holes then job done.
Run a small dremmel brush over it and you'd never know.

-
Taz

- Oldtimer
- Posts: 3995
- Joined: Wed Jan 05, 2011 11:50 am
- Location: Your mothers house
Re: Robs new project Supercharger
^^^ this looks like the welds will clean up nicely.
Hey it will be practice for when all the newbies will line up asking you to supercharge theirs
Hey it will be practice for when all the newbies will line up asking you to supercharge theirs
Bennoz wrote: Cum gunt it!
-
Rob Furniss
- Oldtimer
- Posts: 1394
- Joined: Wed Jan 19, 2011 11:32 pm
- Location: Perth
- Contact:
Re: Robs new project Supercharger
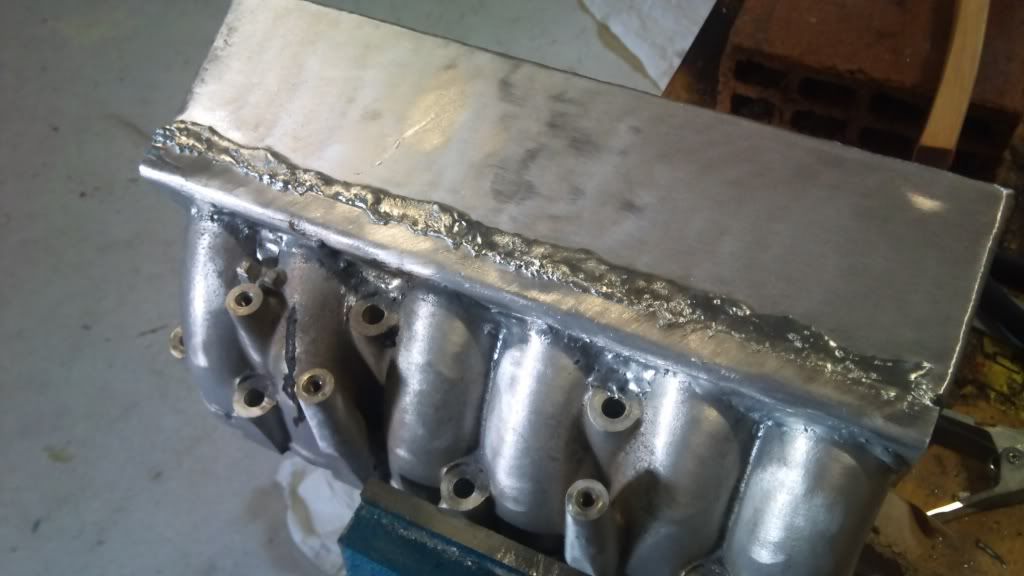
Yeah i'm hoping they will clean up, should be able to see if the welds are good once ive wire-wheeled them.
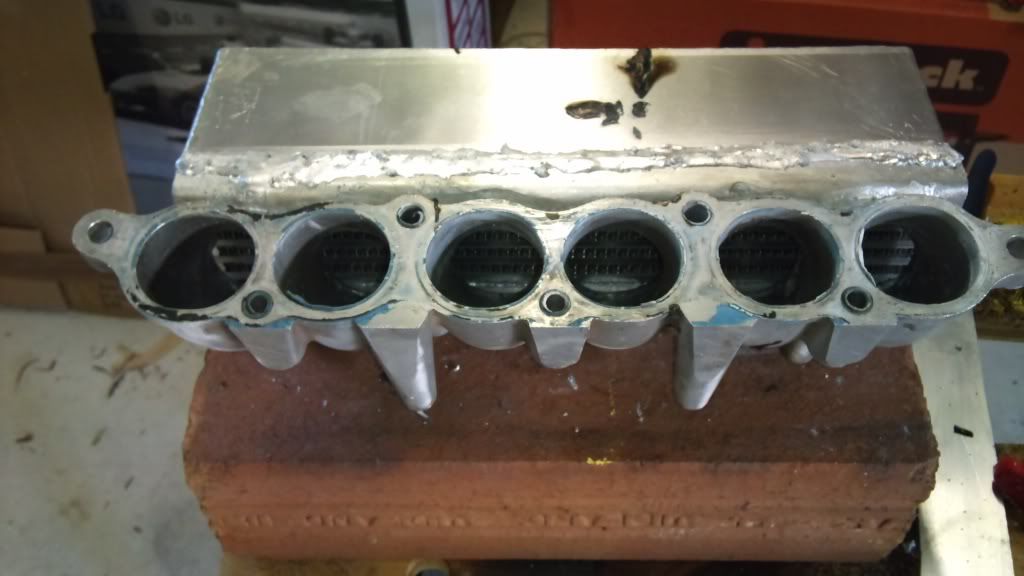
Pics of the top:

Pics of the top:
-
Rob Furniss
- Oldtimer
- Posts: 1394
- Joined: Wed Jan 19, 2011 11:32 pm
- Location: Perth
- Contact:
Re: Robs new project Supercharger
I think it would have been easier with some welders heat sink clay/putty, anyone know where I can get some?
Apparantly modelling clay works, in fact I bet any type of clay/mud will work although may be a bit messy, and it worked for Arnie in Predator so I think it's worth a try.
(but if someone knows that it really doesn't work or it's a stupid idea because certain types are explosive or something then please do let me know)
-
Eltnot

- Mechanic
- Posts: 422
- Joined: Wed Nov 26, 2008 6:00 pm
- Location: Stafford, Brisbane, QLD
Re: Robs new project Supercharger
http://www.barnes.com.au/catalog/locati ... pAodEG9vhQ You can buy clay from here. Normal clay should be fine for welding I would imagine.
-
Rob Furniss
- Oldtimer
- Posts: 1394
- Joined: Wed Jan 19, 2011 11:32 pm
- Location: Perth
- Contact:
Re: Robs new project Supercharger
Cleaned up the welds a little.
Although it looks a bit crap it feels quite solid, I may even tidy it up a little at the end if I have spare rods:
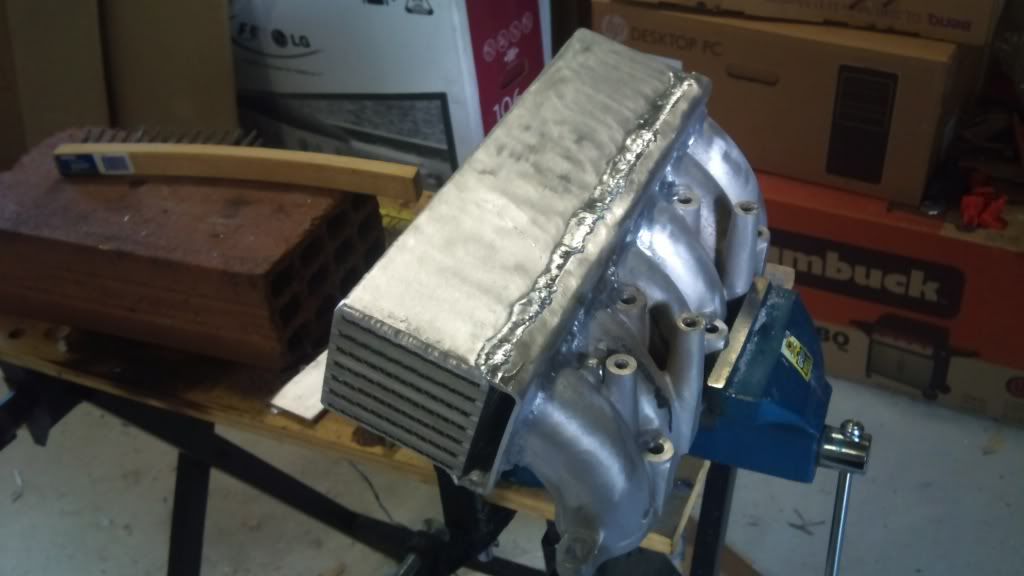
Although it looks a bit crap it feels quite solid, I may even tidy it up a little at the end if I have spare rods:
-
Astron_Boy
- Trolling Gen Y
- Posts: 8400
- Joined: Sun May 27, 2007 5:00 pm
- Location: Wine Country NSW
- Contact:
Re: Robs new project Supercharger
Is that just with a wire wheel?
May I suggest using the likes of a (hmm, don't know the true name) but a die piece grinder on a dremmel. kind of like a hard candie that will smooth all rough edges/ runs.
edit: http://www.instructables.com/id/Get-the ... mels-Bits/
They're simply called grinding bits from what I can tell. (the orange candy looking pieces)
-
Rob Furniss
- Oldtimer
- Posts: 1394
- Joined: Wed Jan 19, 2011 11:32 pm
- Location: Perth
- Contact:
Re: Robs new project Supercharger
Yes mate just a wire wheel, I shall get some die grinding wheels and give them a try, thanks for the tip.Astron_Boy wrote:Is that just with a wire wheel?
May I suggest using the likes of a (hmm, don't know the true name) but a die piece grinder on a dremmel. kind of like a hard candie that will smooth all rough edges/ runs.
edit: http://www.instructables.com/id/Get-the ... mels-Bits/
They're simply called grinding bits from what I can tell. (the orange candy looking pieces)
-
Rob Furniss
- Oldtimer
- Posts: 1394
- Joined: Wed Jan 19, 2011 11:32 pm
- Location: Perth
- Contact:
Re: Robs new project Supercharger
I tried some potters clay - no good, I think it was protecting the rest of the core etc but seemed to just eat up all my heat and it was spitting hot bits at me so I canned that idea.
A bit more progress:
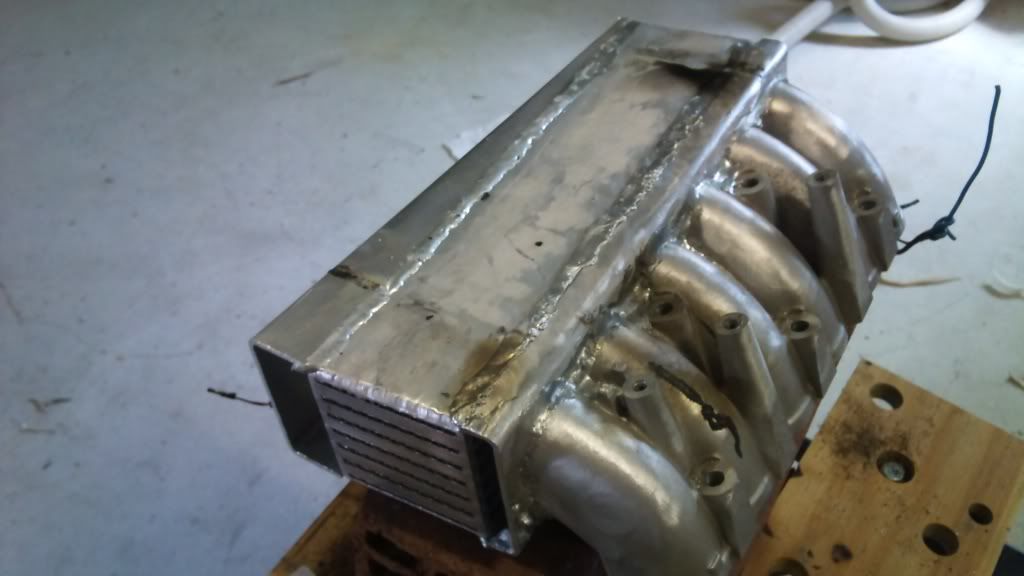
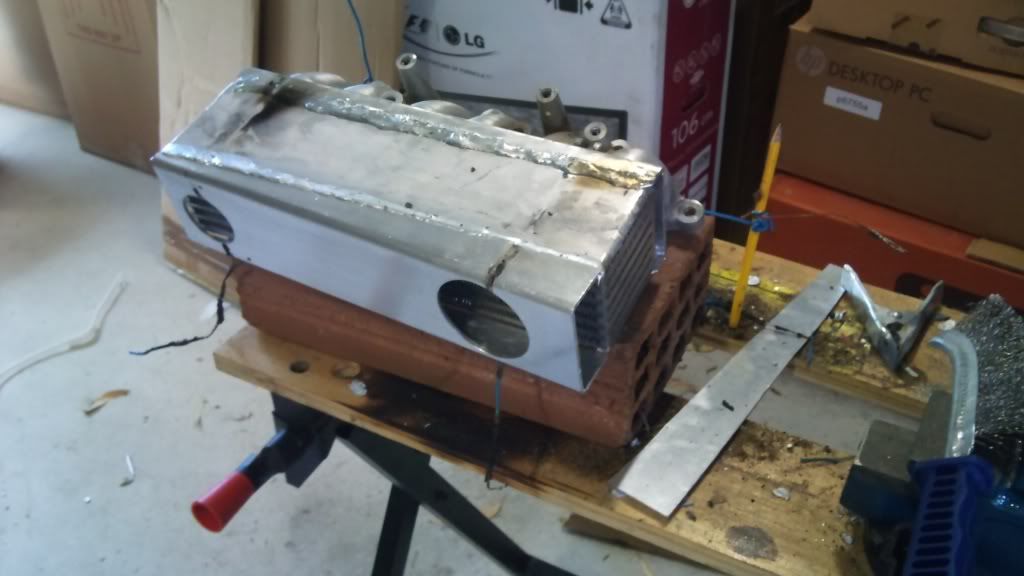
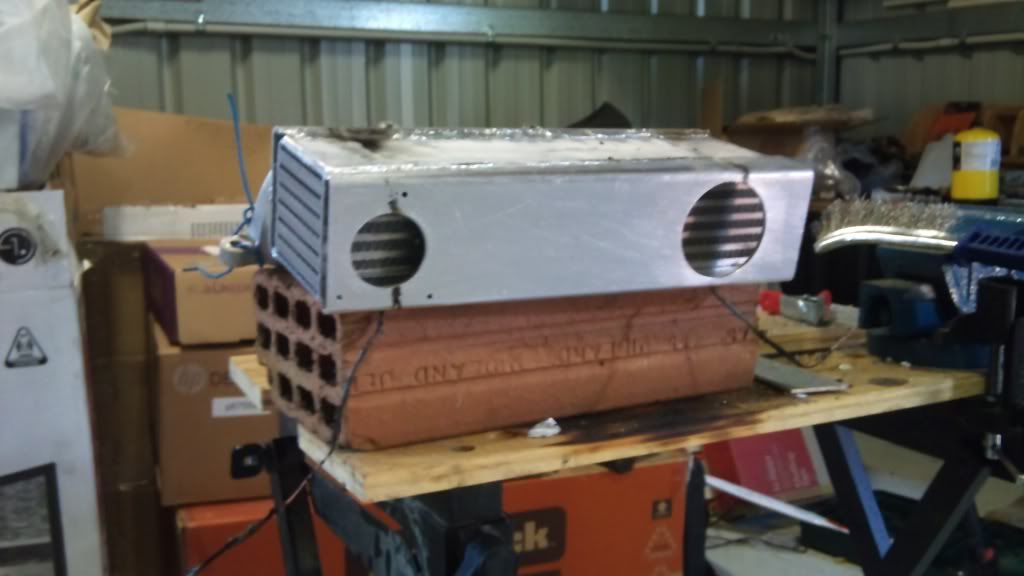
Large 60mm hole is for air from the supercharger, i'm awaiting delivery of some piping for that.
Small 40mm hole is for the bypass valve which will run from between the throttle body and supercharger and opens on vac to bypass the charger in off/low throttle situations.
I reckon when it's finished and cleaned up and polished it will look pretty good, not pro quality but good enough for me.
A bit more progress:
Large 60mm hole is for air from the supercharger, i'm awaiting delivery of some piping for that.
Small 40mm hole is for the bypass valve which will run from between the throttle body and supercharger and opens on vac to bypass the charger in off/low throttle situations.
I reckon when it's finished and cleaned up and polished it will look pretty good, not pro quality but good enough for me.
-
Astron_Boy
- Trolling Gen Y
- Posts: 8400
- Joined: Sun May 27, 2007 5:00 pm
- Location: Wine Country NSW
- Contact:
Re: Robs new project Supercharger
Looks great.
Can tell you were more confident upon doing the other side, the welds seem more fluent.
Can tell you were more confident upon doing the other side, the welds seem more fluent.
-
Rob Furniss
- Oldtimer
- Posts: 1394
- Joined: Wed Jan 19, 2011 11:32 pm
- Location: Perth
- Contact:
Re: Robs new project Supercharger
Thanks mate I think i'm getting the hang of it, using less rods too which is good as i'm almost out but my order from the 30th Jan should arrive soon.
I'm getting there!
I'm getting there!
-
Rob Furniss
- Oldtimer
- Posts: 1394
- Joined: Wed Jan 19, 2011 11:32 pm
- Location: Perth
- Contact:
Re: Robs new project Supercharger
Still working on the charge cooler which now due to all the bits is becoming a pain 
Managed to get an emanage blue with main harness, injector and ignition harnesses for $270 delivered - just waiting for it to arrive then I will wire it up.
Managed to get an emanage blue with main harness, injector and ignition harnesses for $270 delivered - just waiting for it to arrive then I will wire it up.
-
Astron_Boy
- Trolling Gen Y
- Posts: 8400
- Joined: Sun May 27, 2007 5:00 pm
- Location: Wine Country NSW
- Contact:
-
Rob Furniss
- Oldtimer
- Posts: 1394
- Joined: Wed Jan 19, 2011 11:32 pm
- Location: Perth
- Contact:
Re: Robs new project Supercharger
I sort of am, I only have two left lol but have some more arriving any day.Astron_Boy wrote:Thought you might have been waiting for more rods.
I'm onto my 4th bottle of mapp gas too!
I've brazed one of the water end tanks on now and tested by filling with water but it's leaking water into the air chamber which would end up with water in the engine = not good, so i've had to step back a little. Nothing I can't sort out but glad i've found it now.
This is what I mean by becoming a pain, it's just too many parts to accurately braze together with this method as you have to heat up the whole thing and you braze one bit on but then the others start to come apart due to the low melting temp of the rods.
I'm determined to carry on though as i'm so close to finishing it, will then recheck everything.
-
Rob Furniss
- Oldtimer
- Posts: 1394
- Joined: Wed Jan 19, 2011 11:32 pm
- Location: Perth
- Contact:
Re: Robs new project Supercharger
Rods have just arrived, lets hope I won't need any more after these.
I just want to see the end result of this charge cooler now as there's plenty of other stuff to do, anyone considering making one of these yourself - use tig and/or pay a pro.
I just want to see the end result of this charge cooler now as there's plenty of other stuff to do, anyone considering making one of these yourself - use tig and/or pay a pro.
-
clint111

- Grease Monkey
- Posts: 187
- Joined: Wed Sep 07, 2011 3:27 pm
- Location: Sydney
- Contact:
Re: Robs new project Supercharger
Must say, I weighed up the option of learning to tig, and buying a elder, but for the sake of a few welding jobs on my project, I have chosen to run with pay a pro.
Using a local place to laser cut the bits I need, and another guy, a well established long time player in the performance scene, Dave Broadhurst, for my welding requirements.
Beats me fluffing it, or having not nice looking welds, especially the alloy bits. I can mig, but never lent a hand to tig.
Using a local place to laser cut the bits I need, and another guy, a well established long time player in the performance scene, Dave Broadhurst, for my welding requirements.
Beats me fluffing it, or having not nice looking welds, especially the alloy bits. I can mig, but never lent a hand to tig.
-
Rob Furniss
- Oldtimer
- Posts: 1394
- Joined: Wed Jan 19, 2011 11:32 pm
- Location: Perth
- Contact:
Re: Robs new project Supercharger
I think you've made the right decision, i've never even mig'd before so tig welding wasn't really an option (more expensive equipment too) but I didn't see these issues coming with the brazing option and I thought it was the cheapest option, maybe not in the long run.
Lets hope I can get it sorted and move on, good luck with your project too - sounds very cool.
Lets hope I can get it sorted and move on, good luck with your project too - sounds very cool.
-
clint111
- Grease Monkey
- Posts: 187
- Joined: Wed Sep 07, 2011 3:27 pm
- Location: Sydney
- Contact:
Re: Robs new project Supercharger
If you, god forbid, need a replacement top half of the inlet manifold, you can have mine for postage cost.