Ok first thing you will need is to get some things from the auto shop if you don’t already have them.
List of things:-
• Brite Shine Wadding polish
• Scratch X 2.0 polish
• Autosol Metal Polish
• Wet and dry sand paper ( 600–1000-1200-1500-2000 grit )
• Buffing wheel
• Drill
• Polish applicator for the drill
• Spray bottle for water or bucket


There is a polish applicator pad that screws into this


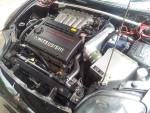
BEFORE PIC

Step 1.
Now that you have all your bits and pieces let’s get started.
Take some of the 600grit and your spray bottle/bucket with water, wet the sand paper and light (this must be done at regular intervals). Start at one side of the light using a circular motion over the lights, this will be to take off the film that is pealing of the lights giving it that faded tacky look. Keep the circular motions small don’t try to do all the light in one hit.
The light will start to get a milky look to it don’t worry about that as it will come clear once you have finished all the steps. Pending on how bad your lights are this step can take some time, just keep going until all the film is removed.
As you can see by the pic bellow you need to keep sanding until the world map is gone


Step 2.
Repeat step 1 with 1000 grit paper and water ( don’t forget to keep wetting sand paper and lights every 30 seconds or so ). This step should be done until all the bigger scratches have been removed.
Follow this up with the 1200, 1500 and 2000 grit papers using the same patterns.
After you get to the 2000 grit the lights should start to look smooth and clear, if not repeat the 2000 grit again.

Step 3.
Time to start with the polish.
Get some of your Brite shine wadding and apply some metal polish to it cover the lights with this the same way you did the sanding (no water this time). Once the light has had a good covering of the polish get your drill and polish applicator and go over the light, keep in mind that the polish should still have a wet look to it, if not add some of the scratch X polish to the light. At this point yes your car will start to get polish splatters all over it, this will wash of later.
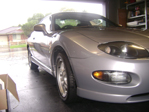
The lights will now start looking like new
Step 4.
Grab your buffing pad and drill and give the light a good buffing to remove the polish.
Now apply some of the scratch X polish (not a lot) and spread it over the lights with your fingers. Give it a hit with your polish applicator and drill again then buff off.
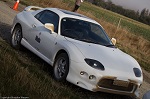
This should now leave your light as it was when it was put on the car at the factory
Step 5.
Repeat all steps to the other light
The imperfections you can see in the lights are on the inside of the cover